How to take summer cuttings

Who wouldn’t turn down a free plant and with plenty of growth on plants in early summer it’s easy to make softwood cuttings if you know how. Quick to root in just a matter of weeks, these cuttings can even go on to flower this season in the cases of some tender perennials. Meanwhile some herbaceous and woody perennials (shrubs and fruit bushes) could produce plants large enough to plant out this autumn so they’re well-established for next year.
Softwood cuttings do require some skills but they’re rewarding and surprising easy to take. And despite needing the protection of a propagator in spring, the warmth of summer usually means that they need little in the way of specialist equipment. A sharp craft knife, a pot of sieved compost and a clear polythene bag are as complicated as the ‘kit’ gets.
What is a softwood cutting
Softwood cuttings are taken from the young new growth of shoots that are produced on plants from spring, through into summer. They are usually vigorous and green in colour, with leaves attached to the stems. This material is actively growing and have the ability to produce roots readily by cell division. The green leaves and stems contain plenty of sugars that can be used to produce these new roots.
Generally this type of growth is of the correct length and condition in late spring and early summer, after which growth often slows. A second, strong flush of growth in late summer is often produced and this can be used for softwood cuttings, too.
Which plants can be grown from softwood cuttings
Some of the easiest plants to grow from cuttings are summer flowering tender and hardy perennials – things like fuchsias, penstemons, salvias and pelargoniums. These will all root in around 4 weeks. In addition there some shrubs such as hydrangeas, forsythia and ribes, that do well from softwood stems. However, for the amateur gardener, the majority of woody plants do better when taken as ‘semi-ripe’ or hardwood cuttings.
Such softwood material is usually pliable, but can easily snap as it is supported by water pressure in the cells of the stem. Always use sharp tools to collect and make softwood cuttings to minimise damage to the tissues.
How to collect softwood cuttings
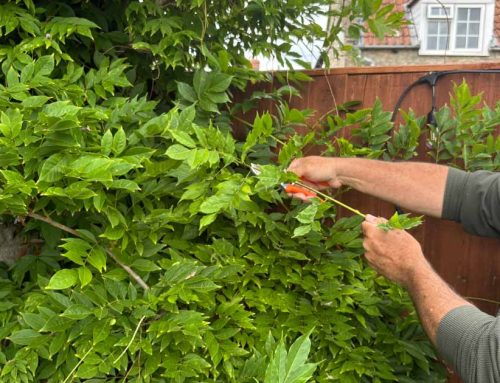
 Due to their soft, pliable nature, softwood cutting material is best collected from the parent plant first thing in the morning, preferably before the sun gets onto the leaves. If the plant has also been well watered the evening before, the tissues will be full of water and firm. This reduces the chances of the material wilting before it gets chance to be made into a cutting.
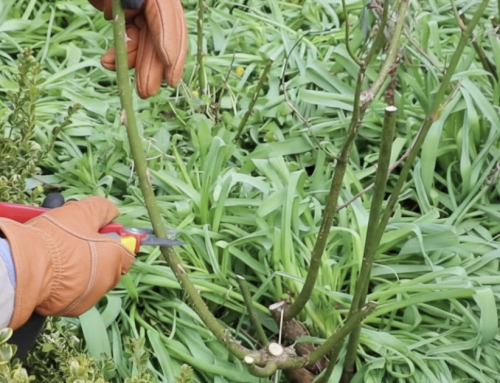
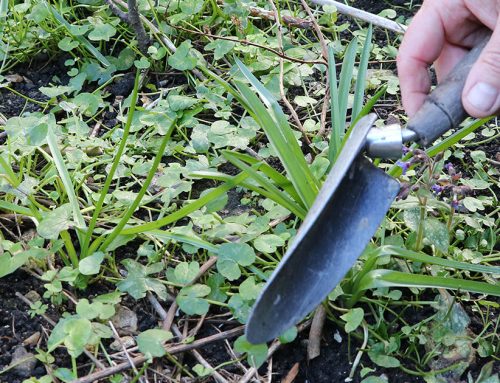
Take the softwood material from parent plant by cutting just above a leaf node on the stem. This will allow the cut to heal successfully. Collect material that is at longer than you need to make the cutting, as it will need to be re-trimmed at the base and the very soft tip removed. This usually means collecting material that is composed of at least 4 leaf joints (nodes) in length, but usually more.
The best types of softwood material comes up sideshoots on the upper half of the plant. Very vigorous shoots often wilt or collapse before they get chance to root. In addition, where possible, choose softwood material without flower buds on it. Such buds can be removed from material if needed, but remember that the formation of flowerbuds takes valuable energy from the stem cutting which could otherwise be used for rooting. It is also crucial to make sure that the material chosen is healthy and free from pests or disease.
As soon as the soft material is cut from the parent plant it will start to lose moisture from its leaves and stems, so pop it into a clear polythene bag to maintain humidity around it. It is important to then get the material out of the sun and to make the cuttings as quickly as possible.
How to make softwood cuttings
 The length of the finished cutting will ultimately depend on the type of plant and the type of material collected. For the amateur gardener, three nodes is really the minimum length for a softwood cutting, allowing for the leaves to be removed from the base. On material with widely spaced leaves and nodes, a large cutting may be more prone to wilting. To make the cutting, I like to use a very sharp craft knife, making the cuts onto a spare tile. Both these bits of kit can be cleaned after use.
Start by removing the soft tip from the cutting, back to just above the uppermost set of fully expanded leaves. Unexpanded or young leaves will continue to expand and take valuable energy away from the cutting which is needed for rooting. Likewise, carefully pinch out any sideshoots from the nodes.
Next trim the base of the cutting just below a nodal point where a leaf or pair of leaves is attached. Strip or cut leaves from the lower half of the cutting. Meantime fill a small flowerpot with sieved, peat-free seed and cuttings compost. Alternatively you could mix peat-free multi-purpose compost in equal parts by volume with horticultural grit or perlite (NOT vermiculite). Tap the pot to settle the compost in place just below the rim, and push the cuttings in around the edge as far as the middle nodes. Although hormone rooting compounds are available, this should not be necessary for softwood cuttings.
Where to root softwood cuttings
 Once they are inserted in the compost, water them well with a watering can with a fine rose attached, and allow the excess to drain away. Then place the pot of cuttings inside an unheated propagator, or simply put it in a clear plastic bag. Inflate the bag around the cuttings so that their leaves don’t touch the inside surface, and secure with an elastic band.
Put the propagator or the bag containing the cuttings in a bright, well-lit place close to a window, but out of direct sunlight. This will prevent them wilting, but allow sufficient light for the cuttings to continue making sugars to stay alive.
Being covered will maintain humidity around the cuttings which will also reduce the chances of them wilting. Don’t over-wet the compost as the base of the stem needs air in the pores of the moist compost in order to make roots. It shouldn’t be necessary to apply water more than weekly and if the compost still feels moist to the touch then leave things as they are.
Signs of successful rooting are sustained maintenance of the leaves without wilting and the appearance of new shoots from the base of one or more leaves where they join the stem. Avoid the temptation to keep pulling the cuttings from the compost to check for roots as this will break the intimate contact between the base of the stem and the moist compost. Wait until you see roots coming from the base of the pot before carefully knocking the cuttings from the pot and potting them up individually.
Related Posts